What is Slipform Cob?
Slipform cob, also known as shuttered cob, is a method of building cob walls using removable forming systems. Forms are constructed, set in place where the walls are to be built, and loose cob material is then packed inside the forms, or “shuttering”, to create the wall. When the forms are filled, they are then removed and moved up for the next lift of cob. This process is repeated until the cob walls are built to the specified height.
The slipform cob method had been used in the United Kingdom during the nineteenth century to build a variety of cob structures, and the method has been recently updated and repurposed by the CobBauge research project. Apart from this, slipform cob has not been a widely used method to build cob walls with. However, it’s becoming more popular now and a lot of testing and research is being done using this method because of its many great advantages.
You can discover more about CobBauge at https://www.cobbauge.eu/en/
Characteristics of Slipform Cob vs Hand-Sculpted Cob
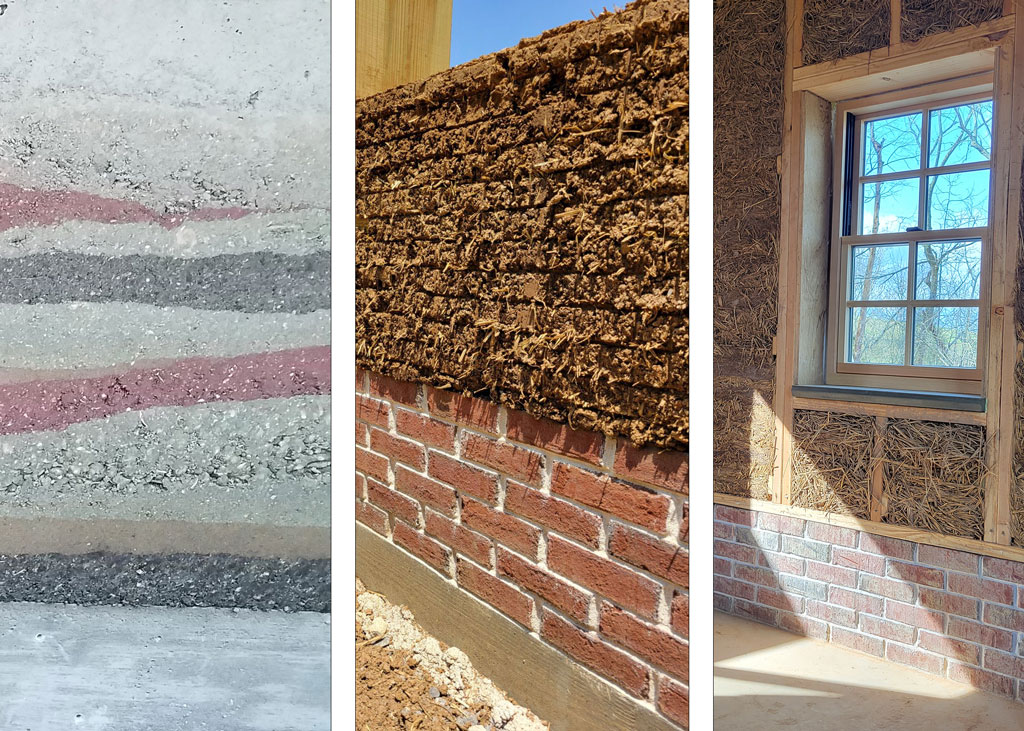
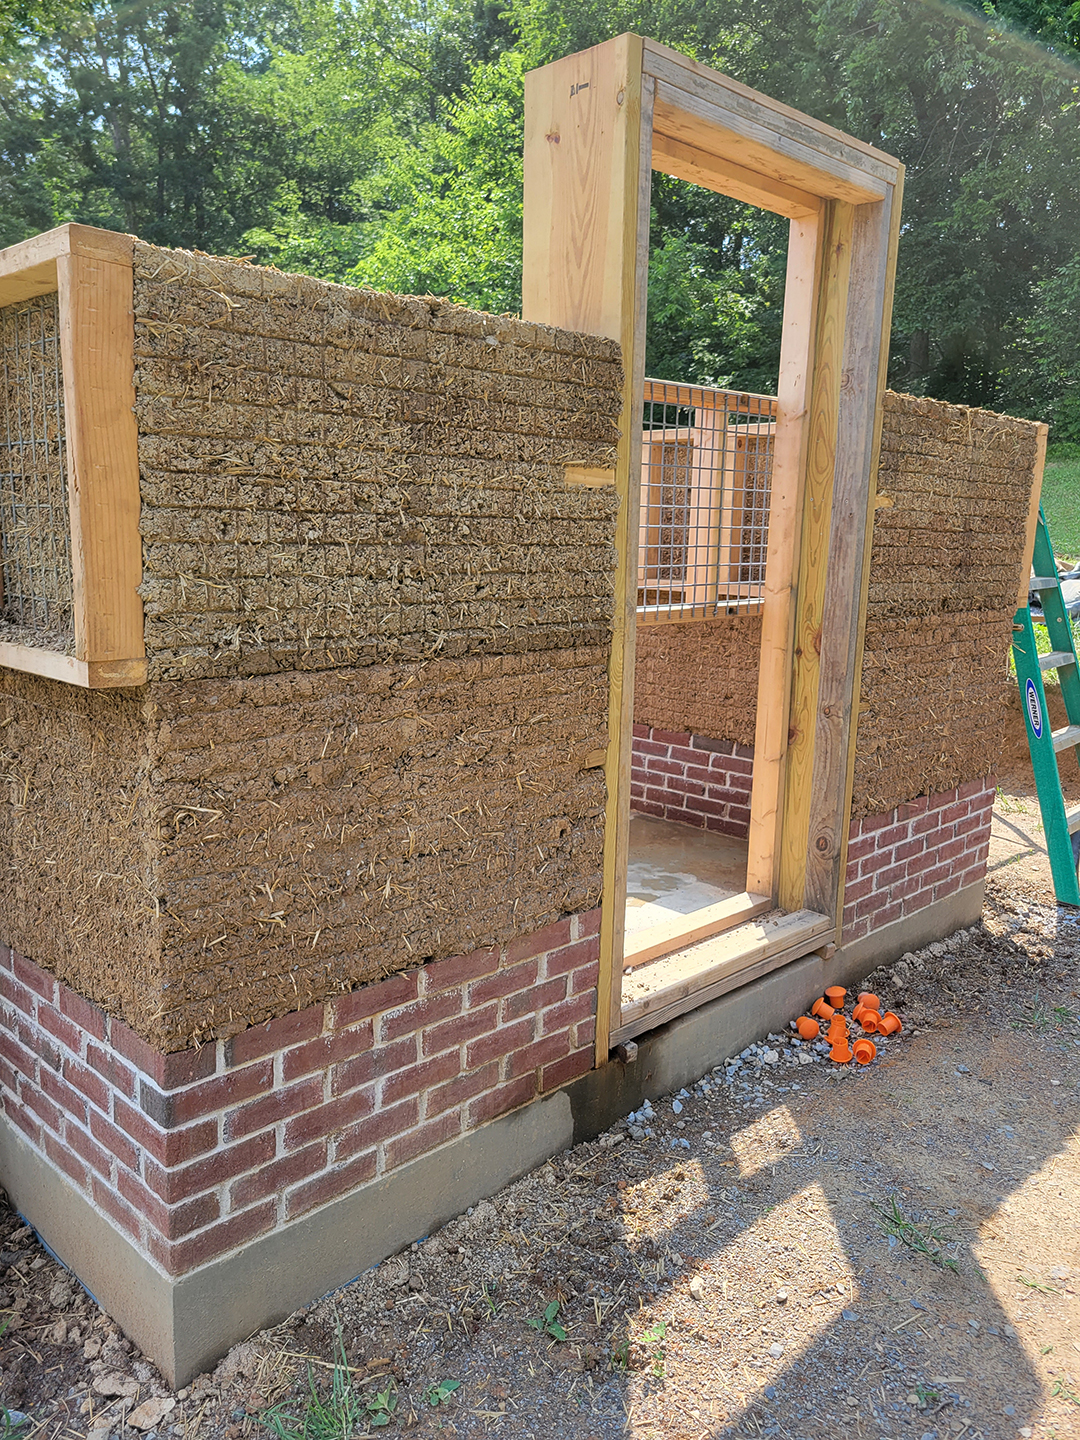
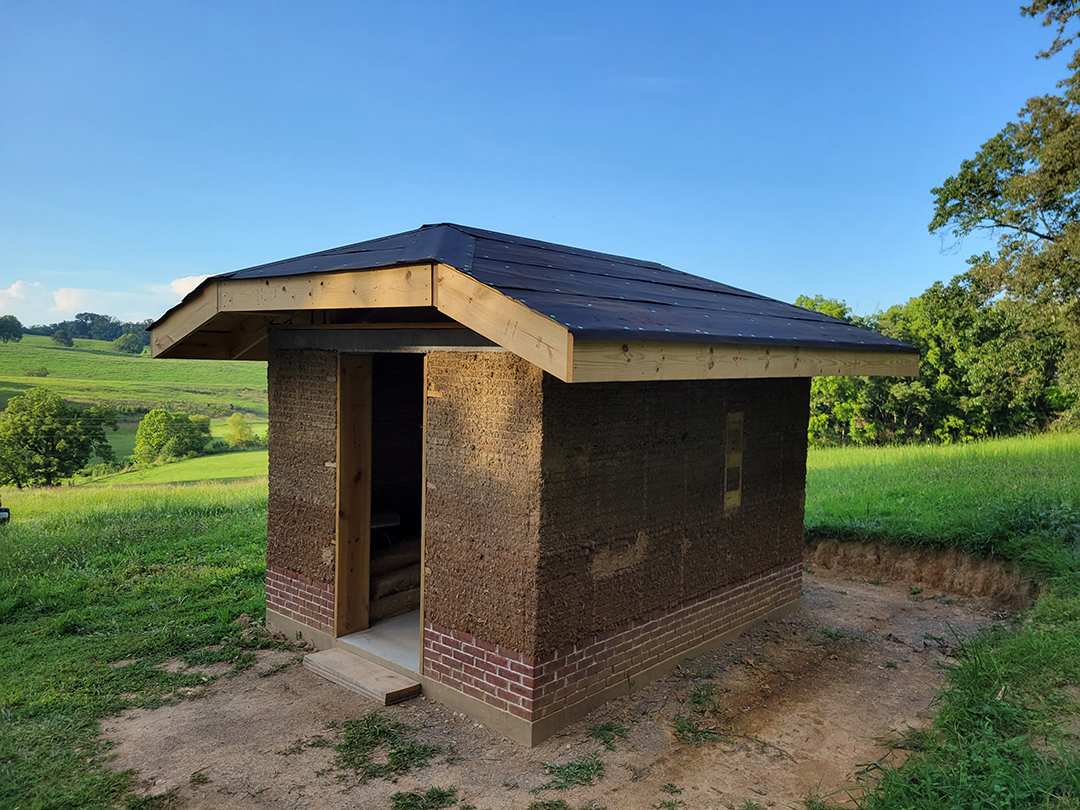
Slipform cob walls are most notable for their high level of precision in the walls being flat and vertically plumb with little organic undulation or “bumps”. They also have far fewer vertical “cracks” than traditional cob walls, due to slipform cob being mixed slightly drier. Slipform cob walls also have a textured grid pattern imprinted on the surfaces of them. This grid pattern is imprinted from the metal mesh siding on the forms.
Benefits of Slipform Cob Walls
There are several amazing benefits to slipform cob walls versus the traditional hand-sculpting methods of building cob walls.
Benefits of slipform cob building include:
- Perfectly vertical walls.
- Faster cob wall construction time. This drastically reduces cob building’s most major downside, the required labor time!
- No wall trimming or shaping is required. This saves a large amount of time and labor.
- Drastically reduced amounts of wasted cob trimmings.
- You can easily create a dual wall system inside of forms. Half cob, half high-insulation mix.
- You can easily add insulation inside the middle of a cob wall when building inside forms.
- You can easily embed wooden wall anchors or framing into cob walls where desired.
- Much less cob wall “cracking”. It’s easier to use a drier, stiffer cob mix when building inside of forms. Cob walls dry with minor cracks when too much water is added to the mix.
- You can embed conduits, outlets, and pipes by attaching them to the formwork and building cob around them.
How to Build Slipform Cob Walls
Building slipform cob walls are actually much easier than hand-sculpting them. It takes less labor and less skill, and it can greatly increase the speed of building cob walls! There is an initial labor investment in building your formwork, but this is minimal in the big picture, and it will save you a lot of energy and time overall.
Building Forms
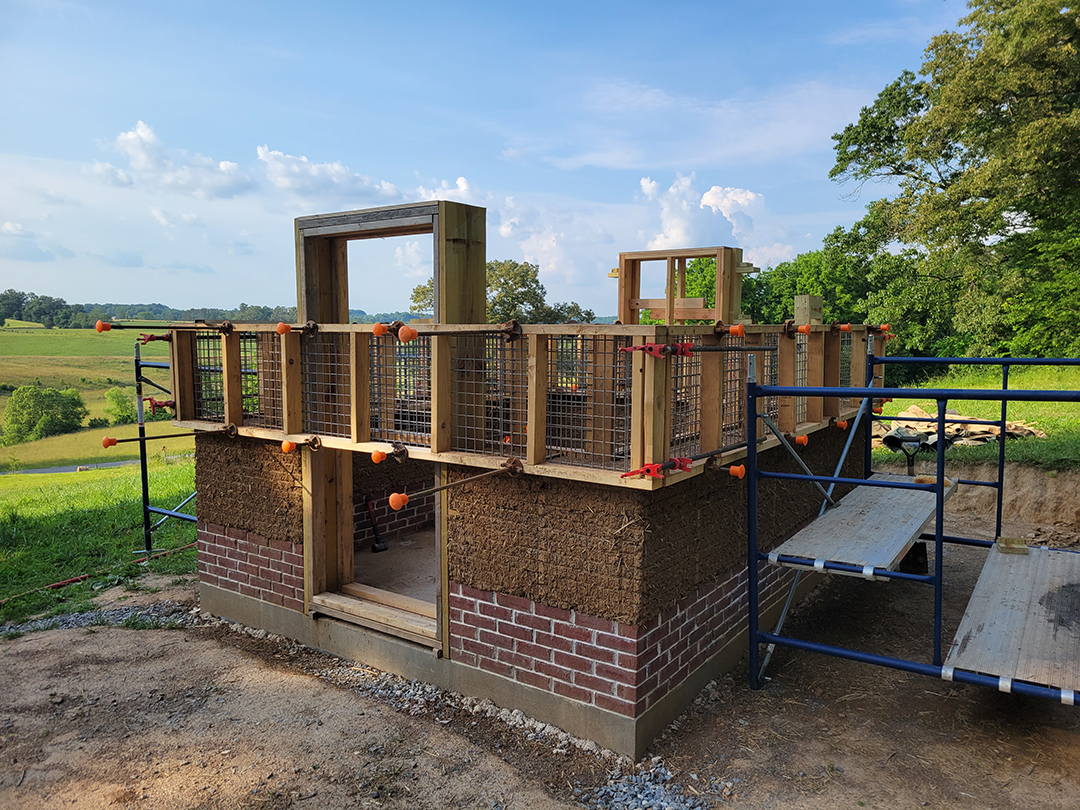
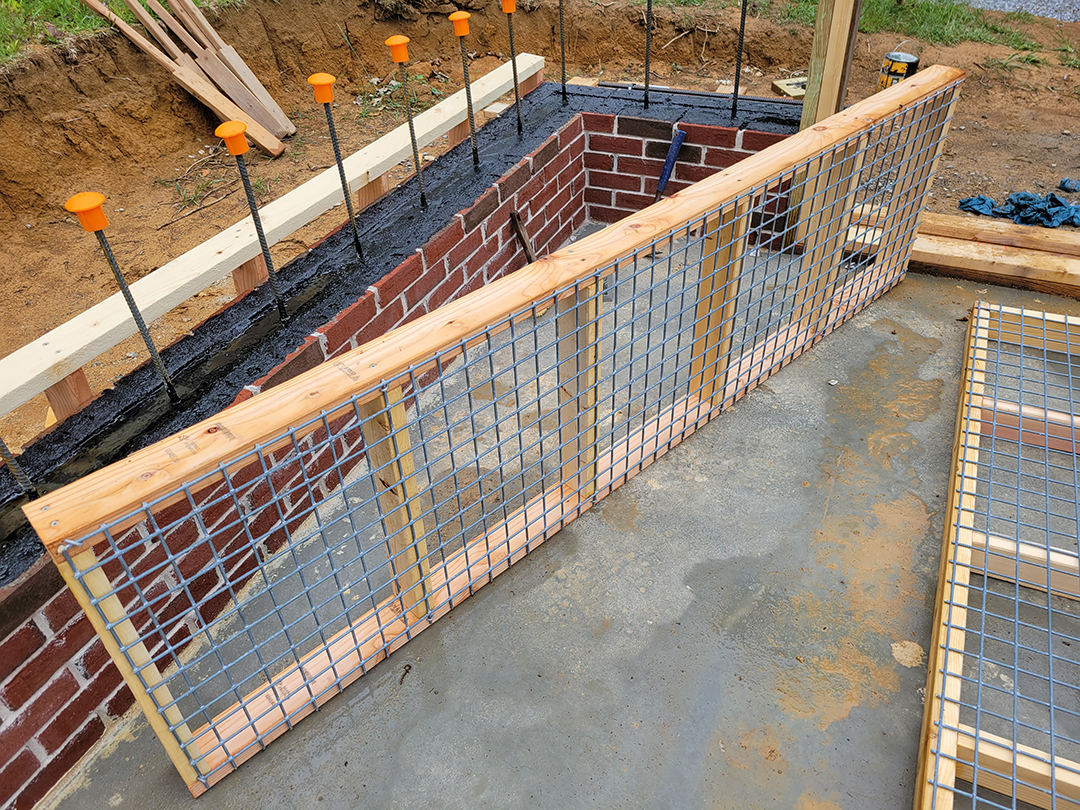
There are a few main differences between cob forms and rammed earth forms. Cob slipforms do not need to be nearly as strongly engineered and robust as rammed earth forms do. There is much less pressure put into cob forms, compared to with rammed earth. The other major difference is that cob forms have an open-air metal mesh siding, instead of plywood siding for rammed earth forms.
Cob forms can be built very practically, simply using a 2×4 wood framing, and nailing thick gauge metal mesh on as siding. I nail the metal mesh on with thick fencing nails. I would avoid building your forms with metal, since these will be much heavier, more expensive, and more challenging to build.
The most challenging part of building these style of forms is acquiring the right type of metal mesh. I recommend a 6 gauge metal mesh for the siding. The openings should ideally not be larger than 2 inch x 2 inch. Smaller holes in the mesh are better. You may need to shop around and find what works for you. The main point is that you do not want the mesh to bend and bow out under the pressure of the cob inside the form.
The last major step in building forms is drilling holes for your metal threaded rods to slide through. These rods, along with the brackets, are what tighten and hold your forms together on both sides. Place your rods through the form frames, and not through the holes in your metal mesh. For best results, lay your pair of interior and exterior forms together flat, and use a drill press to align the holes through the pair accurately.
Note: I recommend purchasing 5/8 inch threaded rods and brackets from a company called DYWIDAG. I prefer to order 4 foot long rods for plenty of variability in wall thickness.
There are several different ways that you can configure your forms. Cob slipforms are usually built between 2 and 3 feet high, and span the whole perimeter of the building. If that many forms is not in your budget, you can simply have fewer forms and move them along as you build in sections. You can also make a form for a single wall panel, moving it for every panel of wall that you build. There is actually a lot of room for creativity with how you decide to configure your forms setup.
Setting Up Forms
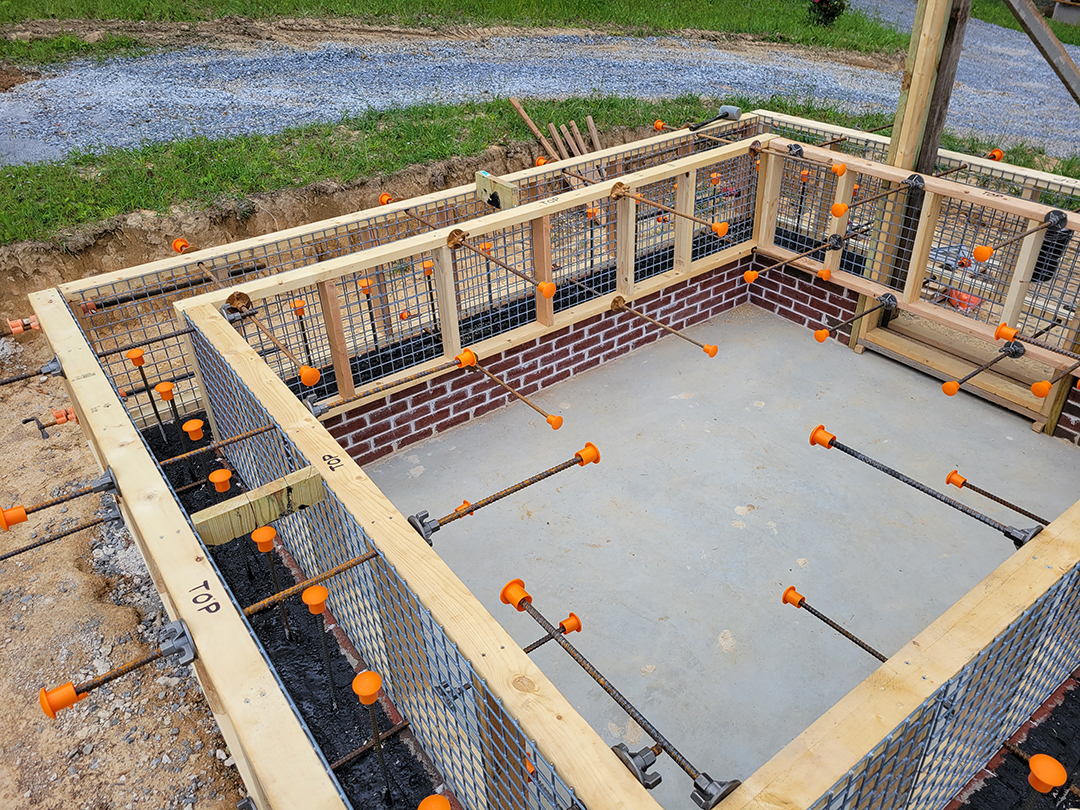
Forms will be set at the level you want your cob walls to begin. This usually begins at the top of your foundation stem wall. The forms will be clamped to the sides of your stem wall with the use of the threaded rods and brackets.
Setup your interior and exterior pair of forms evenly on both sides of your stemwall. Run your threaded rods through the forms, and accurately space the forms apart before tightening the brackets on the rods. It’s also a good idea to add a spacer at the middle of the forms to make sure your forms don’t start bowing out. If the forms do bow out during construction, your spacer will fall out, indicating that your forms are starting to bow.
Level your forms and check any corners for square 90 degree angles. If your forms span large sections of your building, or span the entire perimeter of your building, make sure to use a level across all the farthest lengths to make sure that all of your walls will end up level together. Your cob walls will come out as accurately as your forms are setup. Once your forms are accurately set, you can also add additional supports to any forms using pipe clamps or screws to tighten section of formwork together.
Packing Cob into Forms
When your forms are all set up, it’s time to pack them with cob!
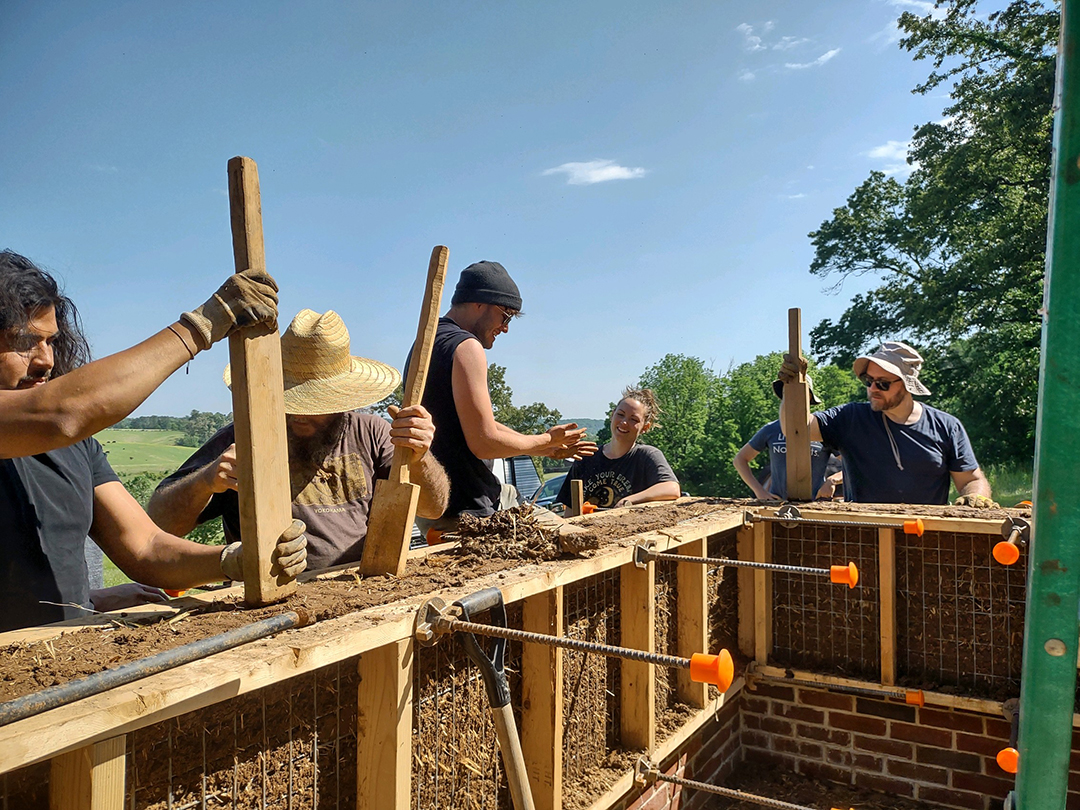
Packing cob is actually very easy and has a very low learning curve. It’s also something almost anyone, of any age, can do with ease. Tamping cob into forms is much less labor intensive than hand-sculpting cob walls, which restricts a lot of people from being able to build cob with you.
Simply dump your loose cob mix into the form, and lightly tamp it into place. Make sure to fill all spaces without leaving gaps in the walls. Another advantage to the mesh form siding is that you can easily see if you missed a spot, and you can tamp some extra cob into that place.
The best tools for tamping cob into the forms are the end of a piece of 2×4 wood, and the end of a piece of 1×2 wood along the edges. You don’t want to use tamping tools with large tamping ends because the tamping power will be too widely distributed. I have successfully used a 2×4 and a 1×2 piece of wood to tamp rammed earth walls, straw-clay walls, and cob walls. They’re extremely simple tools, and very inexpensive to make.
Most cob walls will be between 18 and 24 inches wide. When this is the case, one can easily get inside the forms and step on the cob with their feet. Foot stepping is also a great way to tamp the cob into the forms.
If you see a lot of cob being pushed out the mesh siding of your forms, you are either over-tamping the cob or your cob mixture is too wet. One of the great advantages to slipform cob is that your cob mix can be made more dry that hand-sculpted cob. If your cob is at the right moisture level, it should not come out the sides of the forms much at all.
Some cob will always push its way through the siding of your forms though. As you fill the forms, you’ll want to scrape the metal mesh siding to remove this excess cob. Use a flat headed shovel or a flat edging tool to scrape the forms. The trimmings can be immediately added back into the forms and packed in again.
Fill your forms all the way to the top with packed cob.
Removing and Moving Forms
There are a few factors to consider when removing forms. The first thing to think about is whether the cob inside the forms is dry enough yet hold its shape without the forms on. This will largely depend on the height of your formwork. Two foot high forms will usually be ready to safely remove in a few days time. If you forms are the total height of your wall, you’ll want to wait a few weeks to be safe.
Removing the forms is one factor. The next thing to determine is whether the cob you just packed can safely hold the weight of the forms and the next lift of cob on top of it. The cob must be dry enough to support the next lift of cob without any movement. After a day or two of drying, the previous lift of cob should easily support the weight of your formwork without any slumping or movement. If you place the forms on top of the previous layer, and the forms sink into the cob beneath then its too early to continue building.
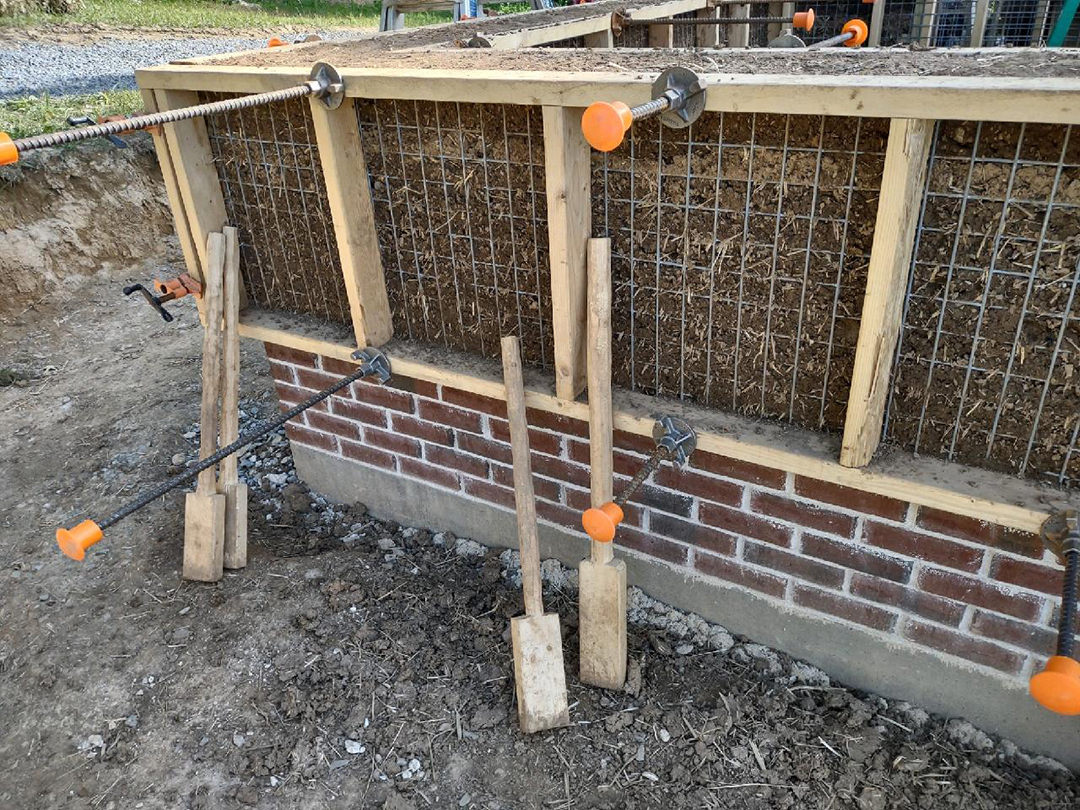
Removing the forms from your previously filled lift is simple. Remove the brackets from your threaded rods, and any additional clamps or screws. Most of the threaded rods can easily be pulled out from the cob walls. The cob will slightly contract away from the metal rods as the cob dries. If the rods are stuck, simply hammer them out.
Once the rods and brackets are removed, peel the forms off the sides of the wall. You may need to use a prybar to loosen the forms off.
Cob Slipform Conclusions
The cob slipform method is a great system for building cob walls with vertical precision and flat surfaces. It will also lend well to anyone wanting to build cob walls to codes and county standards.
If you would like to learn more about how to build using the cob slipform method, you can download my comprehensive cob building video course. In the course, I will show you how to build cob walls with this method. You’ll also learn every step to building a modern, aesthetically pleasing cob house.
Click Here to Download the Cob Video Course.
If you’d like to learn cob slipform method with me in-person, you can join me for an upcoming cob workshop too. Please click here to see my upcoming cob workshop schedule.
Want To Learn Even More About Cob Building?
Take my 17 hour Premium Video Course, guiding you step-by-step through every stage of building a cob house.
