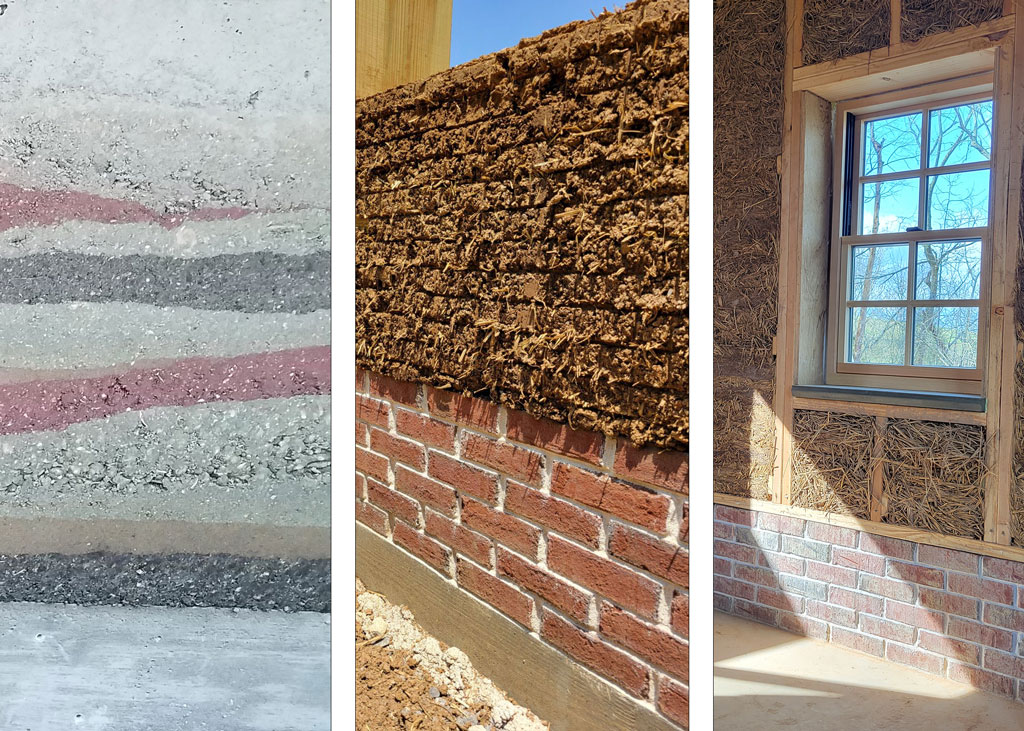
When your foundation is completed, you can begin to build the cob walls. They will sit directly on top of the stem wall foundation and extend up to the bond beam.
Monolithic Building
Cob walls are intended to be monolithic. Instead of the walls being composed of thousands of individual bricks, a cob wall is more like one single giant brick. Ideally, each piece of cob is connected to its adjacent pieces, and each layer of cob is attached to the layer above and beneath it. The bonding between layers and the weight of gravity are important for giving cob walls strength.
Each piece of cob is interconnected with its surrounding pieces, and you also have a three-dimensional texture of interwoven straw between each individual piece of cob. Using the hands and feet, each piece of cob is smeared, pinched, and stomped together as they are applied to the walls. Stomp or smear together any cracks or gaps between cob pieces so they don’t come apart when dry.
In reality, most cob walls never turn out to be completely monolithic. There can be areas of disconnect between layers, or where vertical cracks form. Always strive for the most monolithic cob wall possible, but don’t feel that it has to be perfect. I like to think of a cob wall more as thick monolithic layers. This is usually the way a cob wall is, unless you can manage to build the walls from start to finish with very little pause in between the process. As one layer dries, there will never be a way to completely bond the next layer on top. You will only be able to “key into” a layer if it’s already dry.
Connecting Layers
A cob wall is technically not monolithic if its layers are disconnected. Placing a fresh layer of cob on top of a dry layer of cob will create this type of disconnect. One way to help integrate a dry layer of cob with a freshly placed layer of cob is to use a “key.”
You will discover some misinformation on how to best attach fresh cob to dry cob layers. Some people will tell you to just spray some water over the dry layer before placing the new, fresh layer. This will do absolutely nothing and will not bond the two layers together.
One of the more popular new techniques for integrating fresh to dry cob is to use a “spine and ribs” over the top of the cob wall. This is a method of keying into the next layer. This needs to be done when you are planning to let the cob wall sit for an amount of time that the cob will be dry by the time you return to build more. If you will be gone for two or more days, this is a good idea to do.
When you’re done with a layer of cob and need to let it set for a while, make a spine and ribs. Make a ridge of cob loaves down the center of your wall, attached well together and attached well to the top of the wall. On both sides of the ridge, attach cob loaves to it at right angles going from the ridge to the edge of the wall on the interior and exterior. Between each rib, leave about one foot of space. When you start the next layer, you simply continue to add cob to the wall covering the spine and ribs and building higher.
The spine and ribs technique works for helping to integrate a fresh cob layer to a dry cob layer. I’ve found that it has some faults though. The main one being that the spine and ribs are usually not attached thoroughly enough to the top of the cob wall to begin with. I’ve seen so many spine and ribs simply come right off the top of the wall when they dry because they have very little or no integration to the wall. This could be a matter of just putting more time and labor into better integrating the spine and ribs. But at this point, I think it’s becoming an inefficient task and there are better ways to “key” layers together that take less time and labor.
Instead of building a key by adding cob material, it’s much easier to carve out a key. There is no need to create such a complex keying system like the spine and ribs. Instead, when you complete your layer of cob go to the top of the wall and carve out a 4 to 6 inch wide channel down the middle. Carve it into the top of the wall about 3 to 4 inches. This is a very good key system and will take far less time.
The Basic Process: Place, Kneed, Stomp, Trim
Building with cob is a fairly intuitive skill and you can learn to build cob walls very quickly. Of course, as with anything, practice makes perfect. But you won’t have to get over a steep learning curve before you can successfully build a cob wall. I’ve broken down the process of building cob walls into four simple steps.
Place
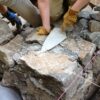
The first step is to take a cob and place it on your wall. When you first begin your wall, you will be placing the cob right on top of the stem wall foundation. The pieces of cob that you apply to your wall can be any size. It usually works to add pieces that are most manageable for you to carry. Sizes usually vary from handfuls to small watermelon sizes.
Add the pieces of cob next to each other. You can push each piece up against the next. They’ll already begin to form into one piece. Add enough pieces so that you cover the full width of the wall, and it’s best to add a little excess over the edges. If you don’t put enough cob to cover the full width of your wall you will end up with your walls being too narrow and potentially tapering in as they rise. Any excess cob will “ooze” off the sides and be trimmed off later. So it’s better to add too much than too little.
Knead
Once you have placed your pieces of cob onto the wall, work them together a little bit with your hands. Knead one piece into the adjacent pieces. If there are gaps between pieces, smear them together to get a little more integration. You don’t have to be very thorough with this step though because we’ll get most of the pieces compressed together in the next step. This step is especially helpful in connecting the pieces together lightly so that they don’t fall apart and off the wall when stomping.
Stomp
Now that you’ve added the cob and lightly kneaded it together, it’s time to stomp it. Stomping will compact the cob together and build its strength. Get on top of the cob and stomp it down with your feet. Many people compress the cob with their hands instead of using their feet. This is not an efficient way to perform this step when you can easily use your body weight and gravity to assist you. Stomp from the top and you can hit the sides of the wall with the side of your foot. Just make sure that you are well balanced if you decide to stand on the wall to stomp.
Trim
After stomping the cob, you will have some cob “oozing” off the sides of the wall. This might seem like a waste of cob material, but it can easily be trimmed off and reapplied onto the wall. Trim off the excess cob with your trimming tool. I prefer to use a hay saw, but you can use a hand saw or a machete if you don’t have one. Again, stand on the top of the wall if you’re using a hay saw and trim the sides of the wall flush with the stem wall or the layer of cob beneath you.
A fresh layer of cob is going to still be soft and malleable making it easy to trim and shape. Depending on the weather conditions, you should be able to easily trim the cob for a few days. Once it gets too dry though it will be impossible to trim. I recommend adding your daily layer of cob and then trimming that layer first thing the next day. It helps to let the cob settle and slightly dry before trimming it.
Trimming is important for keeping your walls vertical, or as close to vertical as possible. As you trim the walls, hold a level against the side. Trim and level until you get as close to vertical as you can get. If you are more concerned about keeping your cob walls perfectly vertical then I recommend using the slipform cob building method.
Slipform Cob
Slipform cob, also known as shuttered cob, is a way to build cob walls by placing the cob mixture inside a formwork of “shuttering” which contains the cob. It is a great way to keep the walls straight and vertically plumb as you build upward without the need for trimming or molding the sides later.
It has been discovered that shuttered cob was employed as a building technique in Britain in the nineteenth century to build a variety of cob structures. Apart from this, shuttered cob has not been a widely used method to build cob walls with. However, it’s becoming more popular now and a lot of testing and research is being done using this method.
Advantages of Slipform Cob Building
- Perfectly vertical walls.
- No wall trimming is required. This saves a large amount of time and labor.
- Drastically reduces amounts of wasted cob trimmings.
- You can easily create a dual wall system inside forms. Half cob, half high-insulation mix.
- You can easily add insulation inside the middle of a cob wall when building inside forms.
- Less wall cracking. It’s easier to use a drier, stiffer cob mix when building inside forms.
- You can attach conduits, outlets, pipes, etc to the formwork and build cob around them.
How thick should cob walls be?
The thinner that cob walls are the less load bearing capacity and thermal mass that they will have. I recommend the width of cob walls be between 18 to 24 inches as a standard. This gives plenty of load bearing capacity for a one story building and plenty of thermal mass.
If your structure is not relying on the load bearing capacity of the cob walls to hold it up then you might consider going for a thinner wall. Especially if they are non-load bearing interior walls. The thinnest I would go with a cob wall is 12 inches wide.
How High Can You Build a Cob Wall?
Cob homes are typically one or two stories tall. It’s rare to see a cob house go up more than two levels in height. In the country of Yemen, there are earthen structures that reach up to seven stories tall. The bases of the walls are built very thick and taper in as they go up.
Another thing to consider if you want to build high walls is that building slows down once you get on scaffolding. You are more limited in your movement and materials have to be delivered up from the ground.
If you are building a cob wall over 8 feet tall, consider the seismic activity and winds in your area. You may want to use metal reinforcement in the walls according to the cob building code (2021 IRC Appendix U).
How Much Cob Can You Build Each Day?
It’s a general practice to build up about one foot of cob per day. However, this is only a guideline and does not have to be strictly adhered to. How far up you can or should go in a day will depend on certain factors.
In good weather conditions with lots of sunlight and breezes you can easily build up one or more feet per day. The truth is that in most cases you won’t have the time or labor to go higher than one foot per day anyway. Just keep in mind how high you’re building each day and give each layer sufficient time to dry.
Each layer does not have to dry completely before you can add the next layer. Generally, you can apply one layer, let it sit overnight, and then apply the next layer the following morning.
The rate of cob construction will also depend a lot on how much water you are putting into your cob mixture. Wet cob will take longer to dry and will reduce the speed of building. Drier cob is more challenging to work with in the hands, but it stacks and dries faster. This is another advantage that slipform cob building has over hand-sculpted and trimmed walls. Slipform cob works best with a drier, stiffer cob mixture, and you can build in the forms at a very steady rate.
Scaffolding
When working with cob, always remember that it’s best to be working just below your waist level. If you try to work too far below or above your waist level you will put unnecessary strain on your lower back or upper body by leaning down or extending too high.
As you work higher on your walls you will come to a point where you will need some form of scaffolding. Always use safe and secure scaffolds when working above ground level. Makeshift scaffolds can work in many instances, but it’s always better to have approved scaffolds when you can.
Working up high increases the chances for worksite accidents and injuries. By using safe scaffolding systems, being aware of surroundings, and communicating with other workers on the building site you can drastically lower the chances of any problems happening.
